

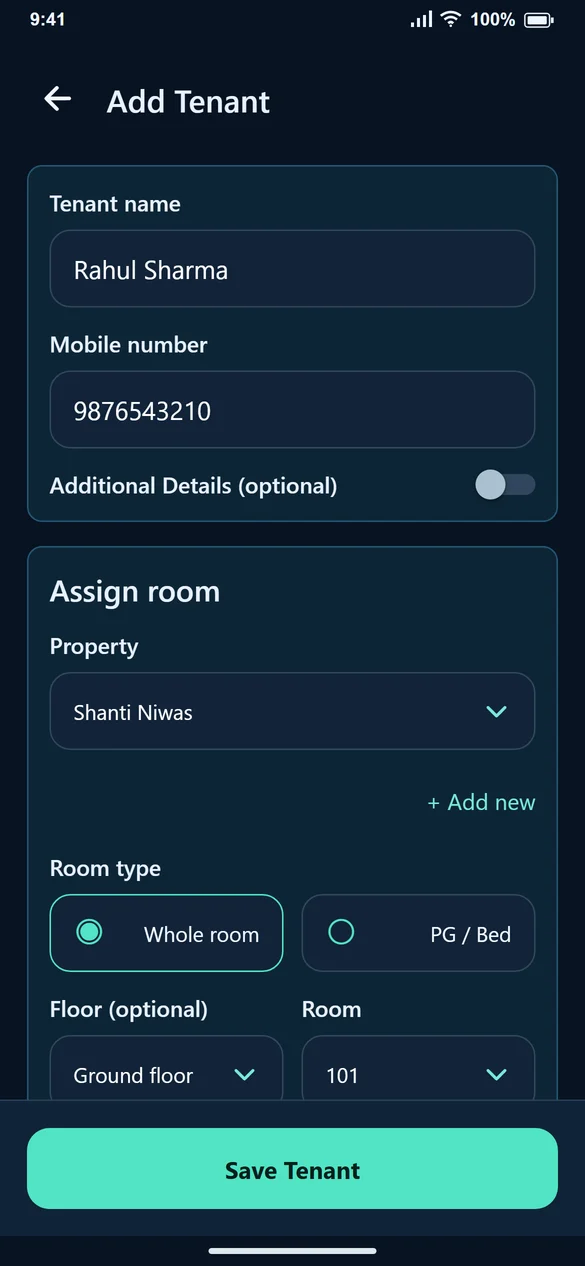
1. Enter the tenant’s details
Use the tenant’s actual name and correct mobile number. Bill sharing uses the tenant’s contact information, so check the number before you continue. Do not create a second profile merely because the same person rents another room.
2. Select or add the property
Choose an existing property, or use Add new and give the building a recognisable name. If the floor is useful, select it or add it. Floor is optional; the property and room should still clearly identify the accommodation.
3. Choose the room type and room
Choose Whole room for a private room, or PG / Bed for shared accommodation. Select an existing room from the list. Use Add new room only when it is not already listed. For a PG stay, also select a vacant bed.
4. Set the rent and dates
Enter monthly rent, move-in date and rent due day. The due-day input accepts 1–28. Security deposit is optional and is separate from a rent payment. Review these fields before saving.
5. Add optional details or continue
Enable Additional Details if you want to enter an emergency contact, address, ID type, ID number or ID image. Otherwise leave it off. Select Save Tenant and then Create First Bill, or choose Do this later.
Common questions
Should I add the floor first in a separate menu?
Not necessarily. The quick tenant form lets you choose or add the floor as part of room setup.
Why can’t I choose an occupied room?
Check whether it is already assigned. For a shared PG room, choose an available bed. Do not overwrite another active stay.
What if a required field is wrong?
Read the message below the highlighted input, correct that value and save again.