

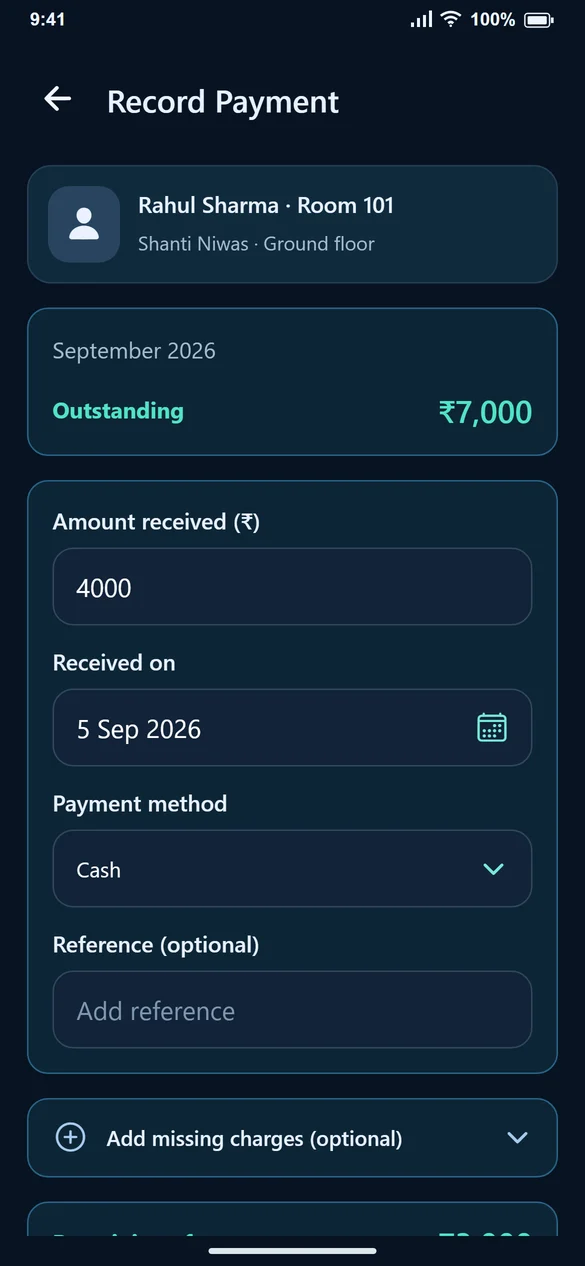
Start with the bill, then enter the receipt
Open Record Payment from Home or from View Bill. Confirm the tenant, room and bill month. Enter only the amount you received, select the received-on date and choose the payment method. A reference is optional but can help you find a bank or UPI transfer later.
A partial payment is still a payment
You do not have to wait for the full rent. Record the first ₹4,000 now and record the remaining ₹3,000 when it arrives. The payment history keeps the receipts attached to the bill instead of relying on a note such as “partly paid”.
Cash, UPI and Bank transfer describe the receipt
Choosing a method tells you how the money came in. It does not initiate a debit, check a bank balance or prove a transfer was successful. Confirm receipt using your own cash or banking records before you select Confirm Received.
Send a receipt with the balance
After confirming, check the payment-recorded screen and use Share Receipt. The receipt can show both the amount received and the amount still pending. For a tenant paying in instalments, that is more useful than a message saying only “received”.
Use reports for a specific question
Filter Billing by month or status to review unpaid or partly paid bills. Use Excel export when your plan includes it. A bill total describes charges raised; the paid total describes recorded receipts. Keep those meanings separate when reviewing your monthly figures.
Common questions
Does creating a bill increase collected rent?
No. Collected amounts depend on recorded payments, not simply on creating the bill.
Can I record less than the outstanding amount?
Yes. Enter the amount actually received. The rest remains pending.
What if a payment request times out?
Check the bill’s payment history or use the app’s recovery option before trying again. The payment may have been saved even if the confirmation did not appear.